
Loading...
Loading...
Loading...
Loading...
Loading...
Loading...
Loading...
Loading...
Loading...
Loading...
Loading...
Loading...
Loading...
Loading...
Loading...
Loading...
Loading...
Loading...
Loading...
Loading...
This page links to multiple quick start guides for deploying Pinot to different public cloud providers.
This section contains quick start guides to help you get up and running with Pinot.
This page lists pages with frequently asked questions with answers from the community.
This quick start guide will help you bootstrap a Pinot standalone instance on your local machine.
This page has a collection of frequently asked questions of a general nature with answers from the community.
export TZ=UTC-Duser.timezone=UTCbrew install kubernetes-clikubectl versionbrew install kubernetes-helmhelm versioncurl "https://d1vvhvl2y92vvt.cloudfront.net/awscli-exe-macos.zip" -o "awscliv2.zip"
unzip awscliv2.zip
sudo ./aws/installbrew tap weaveworks/tap
brew install weaveworks/tap/eksctlaws configureEKS_CLUSTER_NAME=pinot-quickstart
eksctl create cluster \
--name ${EKS_CLUSTER_NAME} \
--version 1.16 \
--region us-west-2 \
--nodegroup-name standard-workers \
--node-type t3.xlarge \
--nodes 1 \
--nodes-min 1 \
--nodes-max 1eksctl utils associate-iam-oidc-provider --region=us-east-2 --cluster=pinot-quickstart --approve
eksctl create iamserviceaccount \
--name ebs-csi-controller-sa \
--namespace kube-system \
--cluster pinot-quickstart \
--attach-policy-arn arn:aws:iam::aws:policy/service-role/AmazonEBSCSIDriverPolicy \
--approve \
--role-only \
--role-name AmazonEKS_EBS_CSI_DriverRole
eksctl create addon --name aws-ebs-csi-driver --cluster pinot-quickstart --service-account-role-arn arn:aws:iam::$(aws sts get-caller-identity --query Account --output text):role/AmazonEKS_EBS_CSI_DriverRole --forceEKS_CLUSTER_NAME=pinot-quickstart
aws eks describe-cluster --name ${EKS_CLUSTER_NAME} --region us-west-2EKS_CLUSTER_NAME=pinot-quickstart
aws eks update-kubeconfig --name ${EKS_CLUSTER_NAME}kubectl get nodesEKS_CLUSTER_NAME=pinot-quickstart
aws eks delete-cluster --name ${EKS_CLUSTER_NAME}tar -zxvf apache-pinot-$PINOT_VERSION-bin.tar.gzcd apache-pinot-$PINOT_VERSION-binOLDER_VERSION="0.10.0"
wget https://archive.apache.org/dist/pinot/apache-pinot-$OLDER_VERSION/apache-pinot-$OLDER_VERSION-bin.tar.gzPINOT_VERSION=0.12.0 #set to the Pinot version you decide to use
wget https://downloads.apache.org/pinot/apache-pinot-$PINOT_VERSION/apache-pinot-$PINOT_VERSION-bin.tar.gzgit clone https://github.com/apache/pinot.git
cd pinotmvn install package -DskipTests -Pbin-distcd buildThis section describes quick start commands that launch all Pinot components in a single process.
brew install pinot<settings>
<activeProfiles>
<activeProfile>
apple-silicon
</activeProfile>
</activeProfiles>
<profiles>
<profile>
<id>apple-silicon</id>
<properties>
<os.detected.classifier>osx-x86_64</os.detected.classifier>
</properties>
</profile>
</profiles>
</settings> softwareupdate --install-rosetta./bin/pinot-admin.sh QuickStart -type batchexport JAVA_OPTS="-Xms4G -Xmx8G -XX:+UseG1GC -XX:MaxGCPauseMillis=200 -Xloggc:gc-pinot-controller.log"export JAVA_OPTS="-Xms4G -Xmx8G"./bin/pinot-admin.sh StartZookeeper \
-zkPort 2191export JAVA_OPTS="-Xms4G -Xmx8G -XX:+UseG1GC -XX:MaxGCPauseMillis=200 -Xloggc:gc-pinot-controller.log"
./bin/pinot-admin.sh StartController \
-zkAddress localhost:2191 \
-controllerPort 9000export JAVA_OPTS="-Xms4G -Xmx4G -XX:+UseG1GC -XX:MaxGCPauseMillis=200 -Xloggc:gc-pinot-broker.log"
./bin/pinot-admin.sh StartBroker \
-zkAddress localhost:2191export JAVA_OPTS="-Xms4G -Xmx16G -XX:+UseG1GC -XX:MaxGCPauseMillis=200 -Xloggc:gc-pinot-server.log"
./bin/pinot-admin.sh StartServer \
-zkAddress localhost:2191./bin/pinot-admin.sh StartKafka \
-zkAddress=localhost:2191/kafka \
-port 19092<component name="ProjectRunConfigurationManager">
<configuration default="false" name="HelixServerStarter" type="Application" factoryName="Application" nameIsGenerated="true">
<classpathModifications>
<entry path="$PROJECT_DIR$/pinot-plugins/pinot-metrics/pinot-yammer/target/classes" />
<entry path="$MAVEN_REPOSITORY$/com/yammer/metrics/metrics-core/2.2.0/metrics-core-2.2.0.jar" />
</classpathModifications>
<option name="MAIN_CLASS_NAME" value="org.apache.pinot.server.starter.helix.HelixServerStarter" />
<module name="pinot-server" />
<extension name="coverage">
<pattern>
<option name="PATTERN" value="org.apache.pinot.server.starter.helix.*" />
<option name="ENABLED" value="true" />
</pattern>
</extension>
<method v="2">
<option name="Make" enabled="true" />
</method>
</configuration>
</component>Failed to start a Pinot [SERVER]
java.lang.RuntimeException: java.net.BindException: Address already in use
at org.apache.pinot.core.transport.QueryServer.start(QueryServer.java:103) ~[pinot-all-0.9.0-jar-with-dependencies.jar:0.9.0-cf8b84e8b0d6ab62374048de586ce7da21132906]
at org.apache.pinot.server.starter.ServerInstance.start(ServerInstance.java:158) ~[pinot-all-0.9.0-jar-with-dependencies.jar:0.9.0-cf8b84e8b0d6ab62374048de586ce7da21132906]
at org.apache.helix.manager.zk.ParticipantManager.handleNewSession(ParticipantManager.java:110) ~[pinot-all-0.9.0-jar-with-dependencies.jar:0.9.0-cf8b84e8b0d6ab62374048de586ce7da2113docker run \
-p 9000:9000 \
apachepinot/pinot:latest QuickStart \
-type batch./bin/pinot-admin.sh QuickStart -type batchpinot-admin QuickStart -type batchdocker run \
-p 9000:9000 \
apachepinot/pinot:latest QuickStart \
-type batch_json_index./bin/pinot-admin.sh QuickStart -type batch_json_indexpinot-admin QuickStart -type batch_json_indexdocker run \
-p 9000:9000 \
apachepinot/pinot:latest QuickStart \
-type batch_complex_type./bin/pinot-admin.sh QuickStart -type batch_complex_typepinot-admin QuickStart -type batch_complex_typedocker run \
-p 9000:9000 \
apachepinot/pinot:latest QuickStart \
-type stream./bin/pinot-admin.sh QuickStart -type streampinot-admin QuickStart -type streamdocker run \
-p 9000:9000 \
apachepinot/pinot:latest QuickStart \
-type stream_json_index./bin/pinot-admin.sh QuickStart -type stream_json_indexpinot-admin QuickStart -type stream_json_indexdocker run \
-p 9000:9000 \
apachepinot/pinot:latest QuickStart \
-type realtime_minion./bin/pinot-admin.sh QuickStart -type realtime_minionpinot-admin QuickStart -type realtime_miniondocker run \
-p 9000:9000 \
apachepinot/pinot:latest QuickStart \
-type stream_complex_type./bin/pinot-admin.sh QuickStart -type stream_complex_typepinot-admin QuickStart -type stream_complex_typedocker run \
-p 9000:9000 \
apachepinot/pinot:latest QuickStart \
-type upsert./bin/pinot-admin.sh QuickStart -type upsertpinot-admin QuickStart -type upsertdocker run \
-p 9000:9000 \
apachepinot/pinot:latest QuickStart \
-type upsert_json_index./bin/pinot-admin.sh QuickStart -type upsert_json_indexpinot-admin QuickStart -type upsert_json_indexdocker run \
-p 9000:9000 \
apachepinot/pinot:latest QuickStart \
-type hybrid./bin/pinot-admin.sh QuickStart -type hybridpinot-admin QuickStart -type hybriddocker run \
-p 9000:9000 \
apachepinot/pinot:latest QuickStart \
-type join./bin/pinot-admin.sh QuickStart -type joinpinot-admin QuickStart -type joinallowVolumeExpansion: truekubectl edit pvc data-pinot-server-3 -n pinotdocker pull apachepinot/pinot:latestdocker pull apachepinot/pinot:1.0.0docker run \
-p 2123:2123 \
-p 9000:9000 \
-p 8000:8000 \
-p 7050:7050 \
-p 6000:6000 \
apachepinot/pinot:1.0.0 QuickStart \
-type batchdocker network create -d bridge pinot-demodocker run \
--network=pinot-demo \
--name pinot-zookeeper \
--restart always \
-p 2181:2181 \
-d zookeeper:3.5.6docker run --rm -ti \
--network=pinot-demo \
--name pinot-controller \
-p 9000:9000 \
-e JAVA_OPTS="-Dplugins.dir=/opt/pinot/plugins -Xms1G -Xmx4G -XX:+UseG1GC -XX:MaxGCPauseMillis=200 -Xloggc:gc-pinot-controller.log" \
-d ${PINOT_IMAGE} StartController \
-zkAddress pinot-zookeeper:2181docker run --rm -ti \
--network=pinot-demo \
--name pinot-broker \
-p 8099:8099 \
-e JAVA_OPTS="-Dplugins.dir=/opt/pinot/plugins -Xms4G -Xmx4G -XX:+UseG1GC -XX:MaxGCPauseMillis=200 -Xloggc:gc-pinot-broker.log" \
-d ${PINOT_IMAGE} StartBroker \
-zkAddress pinot-zookeeper:2181docker run --rm -ti \
--network=pinot-demo \
--name pinot-server \
-p 8098:8098 \
-e JAVA_OPTS="-Dplugins.dir=/opt/pinot/plugins -Xms4G -Xmx16G -XX:+UseG1GC -XX:MaxGCPauseMillis=200 -Xloggc:gc-pinot-server.log" \
-d ${PINOT_IMAGE} StartServer \
-zkAddress pinot-zookeeper:2181docker run --rm -ti \
--network pinot-demo --name=kafka \
-e KAFKA_ZOOKEEPER_CONNECT=pinot-zookeeper:2181/kafka \
-e KAFKA_BROKER_ID=0 \
-e KAFKA_ADVERTISED_HOST_NAME=kafka \
-p 9092:9092 \
-d bitnami/kafka:latestdocker container ls -aCONTAINER ID IMAGE COMMAND CREATED STATUS PORTS NAMES
9ec20e4463fa bitnami/kafka:latest "start-kafka.sh" 43 minutes ago Up 43 minutes kafka
0775f5d8d6bf apachepinot/pinot:latest "./bin/pinot-admin.s…" 44 minutes ago Up 44 minutes 8096-8099/tcp, 9000/tcp pinot-server
64c6392b2e04 apachepinot/pinot:latest "./bin/pinot-admin.s…" 44 minutes ago Up 44 minutes 8096-8099/tcp, 9000/tcp pinot-broker
b6d0f2bd26a3 apachepinot/pinot:latest "./bin/pinot-admin.s…" 45 minutes ago Up 45 minutes 8096-8099/tcp, 0.0.0.0:9000->9000/tcp pinot-controller
570416fc530e zookeeper:3.5.6 "/docker-entrypoint.…" 45 minutes ago Up 45 minutes 2888/tcp, 3888/tcp, 0.0.0.0:2181->2181/tcp, 8080/tcp pinot-zookeeperversion: '3.7'
services:
pinot-zookeeper:
image: zookeeper:3.5.6
container_name: pinot-zookeeper
ports:
- "2181:2181"
environment:
ZOOKEEPER_CLIENT_PORT: 2181
ZOOKEEPER_TICK_TIME: 2000
pinot-controller:
image: apachepinot/pinot:1.0.0
command: "StartController -zkAddress pinot-zookeeper:2181"
container_name: pinot-controller
restart: unless-stopped
ports:
- "9000:9000"
environment:
JAVA_OPTS: "-Dplugins.dir=/opt/pinot/plugins -Xms1G -Xmx4G -XX:+UseG1GC -XX:MaxGCPauseMillis=200 -Xloggc:gc-pinot-controller.log"
depends_on:
- pinot-zookeeper
pinot-broker:
image: apachepinot/pinot:1.0.0
command: "StartBroker -zkAddress pinot-zookeeper:2181"
restart: unless-stopped
container_name: "pinot-broker"
ports:
- "8099:8099"
environment:
JAVA_OPTS: "-Dplugins.dir=/opt/pinot/plugins -Xms4G -Xmx4G -XX:+UseG1GC -XX:MaxGCPauseMillis=200 -Xloggc:gc-pinot-broker.log"
depends_on:
- pinot-controller
pinot-server:
image: apachepinot/pinot:1.0.0
command: "StartServer -zkAddress pinot-zookeeper:2181"
restart: unless-stopped
container_name: "pinot-server"
ports:
- "8098:8098"
environment:
JAVA_OPTS: "-Dplugins.dir=/opt/pinot/plugins -Xms4G -Xmx16G -XX:+UseG1GC -XX:MaxGCPauseMillis=200 -Xloggc:gc-pinot-server.log"
depends_on:
- pinot-brokerdocker-compose --project-name pinot-demo updocker container ls CONTAINER ID IMAGE COMMAND CREATED STATUS PORTS NAMES
ba5cb0868350 apachepinot/pinot:1.0.0 "./bin/pinot-admin.s…" About a minute ago Up About a minute 8096-8099/tcp, 9000/tcp pinot-server
698f160852f9 apachepinot/pinot:1.0.0 "./bin/pinot-admin.s…" About a minute ago Up About a minute 8096-8098/tcp, 9000/tcp, 0.0.0.0:8099->8099/tcp, :::8099->8099/tcp pinot-broker
b1ba8cf60d69 apachepinot/pinot:1.0.0 "./bin/pinot-admin.s…" About a minute ago Up About a minute 8096-8099/tcp, 0.0.0.0:9000->9000/tcp, :::9000->9000/tcp pinot-controller
54e7e114cd53 zookeeper:3.5.6 "/docker-entrypoint.…" About a minute ago Up About a minute 2888/tcp, 3888/tcp, 0.0.0.0:2181->2181/tcp, :::2181->2181/tcp, 8080/tcp pinot-zookeeperpinot.server.instance.enable.split.commit=true
pinot.server.storage.factory.class.hdfs=org.apache.pinot.plugin.filesystem.HadoopPinotFS
pinot.server.storage.factory.hdfs.hadoop.conf.path=/path/to/hadoop/conf/directory/
pinot.server.segment.fetcher.protocols=file,http,hdfs
pinot.server.segment.fetcher.hdfs.class=org.apache.pinot.common.utils.fetcher.PinotFSSegmentFetcher
pinot.server.segment.fetcher.hdfs.hadoop.kerberos.principle=<your kerberos principal>
pinot.server.segment.fetcher.hdfs.hadoop.kerberos.keytab=<your kerberos keytab>
pinot.set.instance.id.to.hostname=true
pinot.server.instance.dataDir=/path/in/local/filesystem/for/pinot/data/server/index
pinot.server.instance.segmentTarDir=/path/in/local/filesystem/for/pinot/data/server/segment
pinot.server.grpc.enable=true
pinot.server.grpc.port=8090export HADOOP_HOME=/path/to/hadoop/home
export HADOOP_VERSION=2.7.1
export HADOOP_GUAVA_VERSION=11.0.2
export HADOOP_GSON_VERSION=2.2.4
export GC_LOG_LOCATION=/path/to/gc/log/file
export PINOT_VERSION=0.10.0
export PINOT_DISTRIBUTION_DIR=/path/to/apache-pinot-${PINOT_VERSION}-bin/
export SERVER_CONF_DIR=/path/to/pinot/conf/dir/
export ZOOKEEPER_ADDRESS=localhost:2181
export CLASSPATH_PREFIX="${HADOOP_HOME}/share/hadoop/hdfs/hadoop-hdfs-${HADOOP_VERSION}.jar:${HADOOP_HOME}/share/hadoop/common/lib/hadoop-annotations-${HADOOP_VERSION}.jar:${HADOOP_HOME}/share/hadoop/common/lib/hadoop-auth-${HADOOP_VERSION}.jar:${HADOOP_HOME}/share/hadoop/common/hadoop-common-${HADOOP_VERSION}.jar:${HADOOP_HOME}/share/hadoop/common/lib/guava-${HADOOP_GUAVA_VERSION}.jar:${HADOOP_HOME}/share/hadoop/common/lib/gson-${HADOOP_GSON_VERSION}.jar"
export JAVA_OPTS="-Xms4G -Xmx16G -XX:+UseG1GC -XX:MaxGCPauseMillis=200 -Xloggc:${GC_LOG_LOCATION}/gc-pinot-server.log"
${PINOT_DISTRIBUTION_DIR}/bin/start-server.sh -zkAddress ${ZOOKEEPER_ADDRESS} -configFileName ${SERVER_CONF_DIR}/server.confcontroller.data.dir=hdfs://path/in/hdfs/for/controller/segment
controller.local.temp.dir=/tmp/pinot/
controller.zk.str=<ZOOKEEPER_HOST:ZOOKEEPER_PORT>
controller.enable.split.commit=true
controller.access.protocols.http.port=9000
controller.helix.cluster.name=PinotCluster
pinot.controller.storage.factory.class.hdfs=org.apache.pinot.plugin.filesystem.HadoopPinotFS
pinot.controller.storage.factory.hdfs.hadoop.conf.path=/path/to/hadoop/conf/directory/
pinot.controller.segment.fetcher.protocols=file,http,hdfs
pinot.controller.segment.fetcher.hdfs.class=org.apache.pinot.common.utils.fetcher.PinotFSSegmentFetcher
pinot.controller.segment.fetcher.hdfs.hadoop.kerberos.principle=<your kerberos principal>
pinot.controller.segment.fetcher.hdfs.hadoop.kerberos.keytab=<your kerberos keytab>
controller.vip.port=9000
controller.port=9000
pinot.set.instance.id.to.hostname=true
pinot.server.grpc.enable=trueexport HADOOP_HOME=/path/to/hadoop/home
export HADOOP_VERSION=2.7.1
export HADOOP_GUAVA_VERSION=11.0.2
export HADOOP_GSON_VERSION=2.2.4
export GC_LOG_LOCATION=/path/to/gc/log/file
export PINOT_VERSION=0.10.0
export PINOT_DISTRIBUTION_DIR=/path/to/apache-pinot-${PINOT_VERSION}-bin/
export SERVER_CONF_DIR=/path/to/pinot/conf/dir/
export ZOOKEEPER_ADDRESS=localhost:2181
export CLASSPATH_PREFIX="${HADOOP_HOME}/share/hadoop/hdfs/hadoop-hdfs-${HADOOP_VERSION}.jar:${HADOOP_HOME}/share/hadoop/common/lib/hadoop-annotations-${HADOOP_VERSION}.jar:${HADOOP_HOME}/share/hadoop/common/lib/hadoop-auth-${HADOOP_VERSION}.jar:${HADOOP_HOME}/share/hadoop/common/hadoop-common-${HADOOP_VERSION}.jar:${HADOOP_HOME}/share/hadoop/common/lib/guava-${HADOOP_GUAVA_VERSION}.jar:${HADOOP_HOME}/share/hadoop/common/lib/gson-${HADOOP_GSON_VERSION}.jar"
export JAVA_OPTS="-Xms8G -Xmx12G -XX:+UseG1GC -XX:MaxGCPauseMillis=200 -Xloggc:${GC_LOG_LOCATION}/gc-pinot-controller.log"
${PINOT_DISTRIBUTION_DIR}/bin/start-controller.sh -configFileName ${SERVER_CONF_DIR}/controller.confpinot.set.instance.id.to.hostname=true
pinot.server.grpc.enable=trueexport HADOOP_HOME=/path/to/hadoop/home
export HADOOP_VERSION=2.7.1
export HADOOP_GUAVA_VERSION=11.0.2
export HADOOP_GSON_VERSION=2.2.4
export GC_LOG_LOCATION=/path/to/gc/log/file
export PINOT_VERSION=0.10.0
export PINOT_DISTRIBUTION_DIR=/path/to/apache-pinot-${PINOT_VERSION}-bin/
export SERVER_CONF_DIR=/path/to/pinot/conf/dir/
export ZOOKEEPER_ADDRESS=localhost:2181
export CLASSPATH_PREFIX="${HADOOP_HOME}/share/hadoop/hdfs/hadoop-hdfs-${HADOOP_VERSION}.jar:${HADOOP_HOME}/share/hadoop/common/lib/hadoop-annotations-${HADOOP_VERSION}.jar:${HADOOP_HOME}/share/hadoop/common/lib/hadoop-auth-${HADOOP_VERSION}.jar:${HADOOP_HOME}/share/hadoop/common/hadoop-common-${HADOOP_VERSION}.jar:${HADOOP_HOME}/share/hadoop/common/lib/guava-${HADOOP_GUAVA_VERSION}.jar:${HADOOP_HOME}/share/hadoop/common/lib/gson-${HADOOP_GSON_VERSION}.jar"
export JAVA_OPTS="-Xms4G -Xmx4G -XX:+UseG1GC -XX:MaxGCPauseMillis=200 -Xloggc:${GC_LOG_LOCATION}/gc-pinot-broker.log"
${PINOT_DISTRIBUTION_DIR}/bin/start-broker.sh -zkAddress ${ZOOKEEPER_ADDRESS} -configFileName ${SERVER_CONF_DIR}/broker.conf{'errorCode': 410, 'message': 'BrokerResourceMissingError'}select "timestamp" from myTableSELECT COUNT(*) from myTable WHERE column = 'foo'SELECT count(colA) as aliasA, colA from tableA GROUP BY colA ORDER BY aliasASELECT count(colA) as sumA, colA from tableA GROUP BY colA ORDER BY count(colA)SELECT COUNT(*) from myTable option(timeoutMs=20000)pinot.server.enable.query.cancellation=true // false by default
pinot.broker.enable.query.cancellation=true // false by defaultGET /queries: to show running queries as tracked by all brokers
Response example: `{
"Broker_192.168.0.105_8000": {
"7": "select G_old from baseballStats limit 10",
"8": "select G_old from baseballStats limit 100"
}
}`
DELETE /query/{brokerId}/{queryId}[?verbose=false/true]: to cancel a running query
with queryId and brokerId. The verbose is false by default, but if set to true,
responses from servers running the query also return.
Response example: `Cancelled query: 8 with responses from servers:
{192.168.0.105:7501=404, 192.168.0.105:7502=200, 192.168.0.105:7500=200}`


brew install kubernetes-clikubectl versionbrew install kubernetes-helmhelm versionbrew update && brew install azure-cliaz loginAKS_RESOURCE_GROUP=pinot-demo
AKS_RESOURCE_GROUP_LOCATION=eastus
az group create --name ${AKS_RESOURCE_GROUP} \
--location ${AKS_RESOURCE_GROUP_LOCATION}AKS_RESOURCE_GROUP=pinot-demo
AKS_CLUSTER_NAME=pinot-quickstart
az aks create --resource-group ${AKS_RESOURCE_GROUP} \
--name ${AKS_CLUSTER_NAME} \
--node-count 3AKS_RESOURCE_GROUP=pinot-demo
AKS_CLUSTER_NAME=pinot-quickstart
az aks get-credentials --resource-group ${AKS_RESOURCE_GROUP} \
--name ${AKS_CLUSTER_NAME}kubectl get nodesAKS_RESOURCE_GROUP=pinot-demo
AKS_CLUSTER_NAME=pinot-quickstart
az aks delete --resource-group ${AKS_RESOURCE_GROUP} \
--name ${AKS_CLUSTER_NAME}
Pinot quick start in Kubernetes

brew install kubernetes-clikubectl versionbrew install kubernetes-helmhelm versioncurl https://sdk.cloud.google.com | bashexec -l $SHELLgcloud initGCLOUD_PROJECT=[your gcloud project name]
GCLOUD_ZONE=us-west1-b
GCLOUD_CLUSTER=pinot-quickstart
GCLOUD_MACHINE_TYPE=n1-standard-2
GCLOUD_NUM_NODES=3
gcloud container clusters create ${GCLOUD_CLUSTER} \
--num-nodes=${GCLOUD_NUM_NODES} \
--machine-type=${GCLOUD_MACHINE_TYPE} \
--zone=${GCLOUD_ZONE} \
--project=${GCLOUD_PROJECT}gcloud compute instances listGCLOUD_PROJECT=[your gcloud project name]
GCLOUD_ZONE=us-west1-b
GCLOUD_CLUSTER=pinot-quickstart
gcloud container clusters get-credentials ${GCLOUD_CLUSTER} --zone ${GCLOUD_ZONE} --project ${GCLOUD_PROJECT}kubectl get nodesGCLOUD_ZONE=us-west1-b
gcloud container clusters delete pinot-quickstart --zone=${GCLOUD_ZONE}# checkout pinot
git clone https://github.com/apache/pinot.git
cd pinot/helm/pinothelm dependency updatekubectl create ns pinot-quickstart
helm install -n pinot-quickstart pinot ./pinothelm repo add pinot https://raw.githubusercontent.com/apache/pinot/master/helm
kubectl create ns pinot-quickstart
helm install pinot pinot/pinot \
-n pinot-quickstart \
--set cluster.name=pinot \
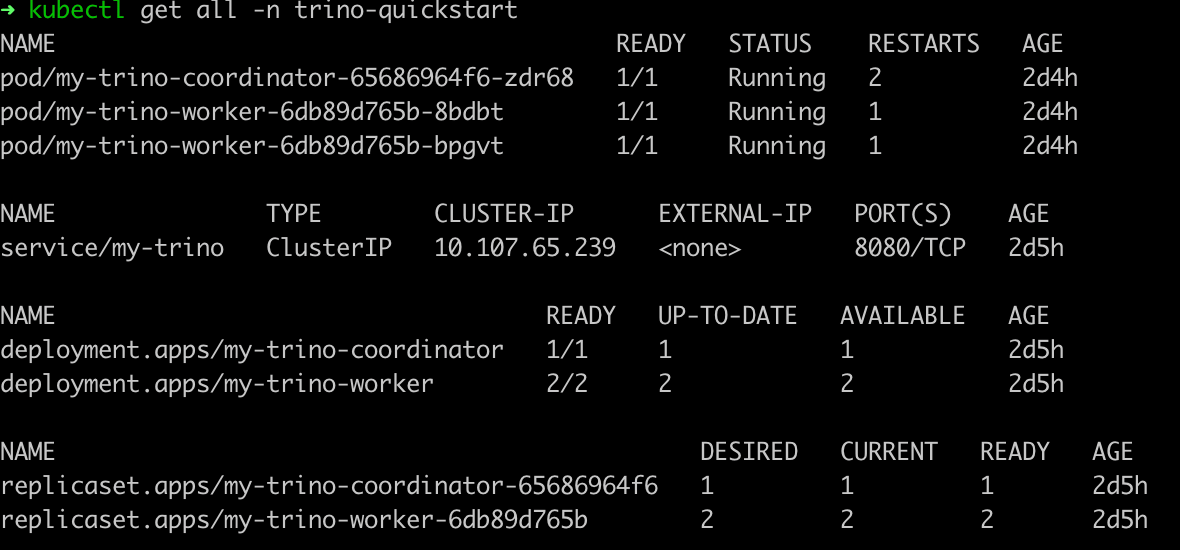
--set server.replicaCount=2kubectl get all -n pinot-quickstarthelm repo add kafka https://charts.bitnami.com/bitnami
helm install -n pinot-quickstart kafka kafka/kafka --set replicas=1,zookeeper.image.tag=latestkubectl get all -n pinot-quickstart | grep kafkapod/kafka-0 1/1 Running 0 2m
pod/kafka-zookeeper-0 1/1 Running 0 10m
pod/kafka-zookeeper-1 1/1 Running 0 9m
pod/kafka-zookeeper-2 1/1 Running 0 8mkubectl -n pinot-quickstart exec kafka-0 -- kafka-topics.sh --bootstrap-server kafka-0:9092 --topic flights-realtime --create --partitions 1 --replication-factor 1
kubectl -n pinot-quickstart exec kafka-0 -- kafka-topics.sh --bootstrap-server kafka-0:9092 --topic flights-realtime-avro --create --partitions 1 --replication-factor 1kubectl apply -f pinot/pinot-realtime-quickstart.yml./query-pinot-data.shhelm repo add superset https://apache.github.io/supersethelm inspect values superset/superset > /tmp/superset-values.yamlkubectl create ns superset
helm upgrade --install --values /tmp/superset-values.yaml superset superset/superset -n supersetkubectl get all -n supersetkubectl port-forward service/superset 18088:8088 -n supersethelm repo add trino https://trinodb.github.io/charts/helm search repo trinohelm inspect values trino/trino > /tmp/trino-values.yamladditionalCatalogs:
pinot: |
connector.name=pinot
pinot.controller-urls=pinot-controller.pinot-quickstart:9000kubectl create ns trino-quickstart
helm install my-trino trino/trino --version 0.2.0 -n trino-quickstart --values /tmp/trino-values.yamlkubectl get pods -n trino-quickstartcurl -L https://repo1.maven.org/maven2/io/trino/trino-cli/363/trino-cli-363-executable.jar -o /tmp/trino && chmod +x /tmp/trinoecho "Visit http://127.0.0.1:18080 to use your application"
kubectl port-forward service/my-trino 18080:8080 -n trino-quickstart/tmp/trino --server localhost:18080 --catalog pinot --schema defaulttrino:default> show catalogs; Catalog
---------
pinot
system
tpcds
tpch
(4 rows)
Query 20211025_010256_00002_mxcvx, FINISHED, 2 nodes
Splits: 36 total, 36 done (100.00%)
0.70 [0 rows, 0B] [0 rows/s, 0B/s]trino:default> show tables; Table
--------------
airlinestats
(1 row)
Query 20211025_010326_00003_mxcvx, FINISHED, 3 nodes
Splits: 36 total, 36 done (100.00%)
0.28 [1 rows, 29B] [3 rows/s, 104B/s]trino:default> DESCRIBE airlinestats; Column | Type | Extra | Comment
----------------------+----------------+-------+---------
flightnum | integer | |
origin | varchar | |
quarter | integer | |
lateaircraftdelay | integer | |
divactualelapsedtime | integer | |
divwheelsons | array(integer) | |
divwheelsoffs | array(integer) | |
......
Query 20211025_010414_00006_mxcvx, FINISHED, 3 nodes
Splits: 36 total, 36 done (100.00%)
0.37 [79 rows, 5.96KB] [212 rows/s, 16KB/s]trino:default> select count(*) as cnt from airlinestats limit 10; cnt
------
9746
(1 row)
Query 20211025_015607_00009_mxcvx, FINISHED, 2 nodes
Splits: 17 total, 17 done (100.00%)
0.24 [1 rows, 9B] [4 rows/s, 38B/s]helm install presto pinot/presto -n pinot-quickstartkubectl apply -f presto-coordinator.yamlhelm inspect values pinot/presto > /tmp/presto-values.yamlhelm install presto pinot/presto -n pinot-quickstart --values /tmp/presto-values.yamlkubectl get pods -n pinot-quickstart./pinot-presto-cli.shcurl -L https://repo1.maven.org/maven2/com/facebook/presto/presto-cli/0.246/presto-cli-0.246-executable.jar -o /tmp/presto-cli && chmod +x /tmp/presto-clikubectl port-forward service/presto-coordinator 18080:8080 -n pinot-quickstart> /dev/null &/tmp/presto-cli --server localhost:18080 --catalog pinot --schema defaultpresto:default> show catalogs; Catalog
---------
pinot
system
(2 rows)
Query 20191112_050827_00003_xkm4g, FINISHED, 1 node
Splits: 19 total, 19 done (100.00%)
0:01 [0 rows, 0B] [0 rows/s, 0B/s]presto:default> show tables; Table
--------------
airlinestats
(1 row)
Query 20191112_050907_00004_xkm4g, FINISHED, 1 node
Splits: 19 total, 19 done (100.00%)
0:01 [1 rows, 29B] [1 rows/s, 41B/s]presto:default> DESCRIBE pinot.dontcare.airlinestats; Column | Type | Extra | Comment
----------------------+---------+-------+---------
flightnum | integer | |
origin | varchar | |
quarter | integer | |
lateaircraftdelay | integer | |
divactualelapsedtime | integer | |
......
Query 20191112_051021_00005_xkm4g, FINISHED, 1 node
Splits: 19 total, 19 done (100.00%)
0:02 [80 rows, 6.06KB] [35 rows/s, 2.66KB/s]presto:default> select count(*) as cnt from pinot.dontcare.airlinestats limit 10; cnt
------
9745
(1 row)
Query 20191112_051114_00006_xkm4g, FINISHED, 1 node
Splits: 17 total, 17 done (100.00%)
0:00 [1 rows, 8B] [2 rows/s, 19B/s]kubectl delete ns pinot-quickstartcurl -X GET "http://localhost:9000/debug/tables/airlineStats?verbosity=0" -H "accept: application/json"{
"OFFLINE": {
"tableName": "airlineStats_OFFLINE",
"tableType": "OFFLINE",
"segmentsConfig": {
"timeType": "DAYS",
"replication": "1",
"segmentAssignmentStrategy": "BalanceNumSegmentAssignmentStrategy",
"timeColumnName": "DaysSinceEpoch",
"segmentPushType": "APPEND",
"minimizeDataMovement": false
},
"tenants": {
"broker": "DefaultTenant",
"server": "DefaultTenant"
},
"tableIndexConfig": {
"rangeIndexVersion": 2,
"autoGeneratedInvertedIndex": false,
"createInvertedIndexDuringSegmentGeneration": false,
"loadMode": "MMAP",
"enableDefaultStarTree": false,
"starTreeIndexConfigs": [
{
"dimensionsSplitOrder": [
"AirlineID",
"Origin",
"Dest"
],
"skipStarNodeCreationForDimensions": [],
"functionColumnPairs": [
"COUNT__*",
"MAX__ArrDelay"
],
"maxLeafRecords": 10
},
{
"dimensionsSplitOrder": [
"Carrier",
"CancellationCode",
"Origin",
"Dest"
],
"skipStarNodeCreationForDimensions": [],
"functionColumnPairs": [
"MAX__CarrierDelay",
"AVG__CarrierDelay"
],
"maxLeafRecords": 10
}
],
"enableDynamicStarTreeCreation": true,
"aggregateMetrics": false,
"nullHandlingEnabled": false,
"optimizeDictionary": false,
"optimizeDictionaryForMetrics": false,
"noDictionarySizeRatioThreshold": 0
},
"metadata": {
"customConfigs": {}
},
"fieldConfigList": [
{
"name": "ts",
"encodingType": "DICTIONARY",
"indexType": "TIMESTAMP",
"indexTypes": [
"TIMESTAMP"
],
"timestampConfig": {
"granularities": [
"DAY",
"WEEK",
"MONTH"
]
}
}
],
"ingestionConfig": {
"transformConfigs": [
{
"columnName": "ts",
"transformFunction": "fromEpochDays(DaysSinceEpoch)"
},
{
"columnName": "tsRaw",
"transformFunction": "fromEpochDays(DaysSinceEpoch)"
}
],
"continueOnError": false,
"rowTimeValueCheck": false,
"segmentTimeValueCheck": true
},
"tierConfigs": [
{
"name": "hotTier",
"segmentSelectorType": "time",
"segmentAge": "3130d",
"storageType": "pinot_server",
"serverTag": "DefaultTenant_OFFLINE"
},
{
"name": "coldTier",
"segmentSelectorType": "time",
"segmentAge": "3140d",
"storageType": "pinot_server",
"serverTag": "DefaultTenant_OFFLINE"
}
],
"isDimTable": false
}
}docker run \
--network pinot-demo --name=kafka \
-e KAFKA_ZOOKEEPER_CONNECT=manual-zookeeper:2181/kafka \
-e KAFKA_BROKER_ID=0 \
-e KAFKA_ADVERTISED_HOST_NAME=kafka \
-d bitnami/kafka:latestdocker exec \
-t kafka \
/opt/kafka/bin/kafka-topics.sh \
--zookeeper manual-zookeeper:2181/kafka \
--partitions=1 --replication-factor=1 \
--create --topic transcript-topicbin/pinot-admin.sh StartKafka -zkAddress=localhost:2123/kafka -port 9876
docker run \
    --network=pinot-demo \
    -v /tmp/pinot-quick-start:/tmp/pinot-quick-start \
    --name pinot-streaming-table-creation \
    apachepinot/pinot:latest AddTable \
    -schemaFile /tmp/pinot-quick-start/transcript-schema.json \
    -tableConfigFile /tmp/pinot-quick-start/transcript-table-realtime.json \
    -controllerHost manual-pinot-controller \
    -controllerPort 9000 \
-execbin/pinot-admin.sh AddTable \
-schemaFile /tmp/pinot-quick-start/transcript-schema.json \
-tableConfigFile /tmp/pinot-quick-start/transcript-table-realtime.json \
-exec{
"tableName": "transcript",
"tableType": "REALTIME",
"segmentsConfig": {
"timeColumnName": "timestampInEpoch",
"timeType": "MILLISECONDS",
"schemaName": "transcript",
"replicasPerPartition": "1"
},
"tenants": {},
"tableIndexConfig": {
"loadMode": "MMAP",
"streamConfigs": {
"streamType": "kafka",
"stream.kafka.consumer.type": "lowlevel",
"stream.kafka.topic.name": "transcript-topic",
"stream.kafka.decoder.class.name": "org.apache.pinot.plugin.stream.kafka.KafkaJSONMessageDecoder",
"stream.kafka.consumer.factory.class.name": "org.apache.pinot.plugin.stream.kafka20.KafkaConsumerFactory",
"stream.kafka.broker.list": "kafka:9092",
"realtime.segment.flush.threshold.rows": "0",
"realtime.segment.flush.threshold.time": "24h",
"realtime.segment.flush.threshold.segment.size": "50M",
"stream.kafka.consumer.prop.auto.offset.reset": "smallest"
}
},
"metadata": {
"customConfigs": {}
}
}{"studentID":205,"firstName":"Natalie","lastName":"Jones","gender":"Female","subject":"Maths","score":3.8,"timestampInEpoch":1571900400000}
{"studentID":205,"firstName":"Natalie","lastName":"Jones","gender":"Female","subject":"History","score":3.5,"timestampInEpoch":1571900400000}
{"studentID":207,"firstName":"Bob","lastName":"Lewis","gender":"Male","subject":"Maths","score":3.2,"timestampInEpoch":1571900400000}
{"studentID":207,"firstName":"Bob","lastName":"Lewis","gender":"Male","subject":"Chemistry","score":3.6,"timestampInEpoch":1572418800000}
{"studentID":209,"firstName":"Jane","lastName":"Doe","gender":"Female","subject":"Geography","score":3.8,"timestampInEpoch":1572505200000}
{"studentID":209,"firstName":"Jane","lastName":"Doe","gender":"Female","subject":"English","score":3.5,"timestampInEpoch":1572505200000}
{"studentID":209,"firstName":"Jane","lastName":"Doe","gender":"Female","subject":"Maths","score":3.2,"timestampInEpoch":1572678000000}
{"studentID":209,"firstName":"Jane","lastName":"Doe","gender":"Female","subject":"Physics","score":3.6,"timestampInEpoch":1572678000000}
{"studentID":211,"firstName":"John","lastName":"Doe","gender":"Male","subject":"Maths","score":3.8,"timestampInEpoch":1572678000000}
{"studentID":211,"firstName":"John","lastName":"Doe","gender":"Male","subject":"English","score":3.5,"timestampInEpoch":1572678000000}
{"studentID":211,"firstName":"John","lastName":"Doe","gender":"Male","subject":"History","score":3.2,"timestampInEpoch":1572854400000}
{"studentID":212,"firstName":"Nick","lastName":"Young","gender":"Male","subject":"History","score":3.6,"timestampInEpoch":1572854400000}bin/kafka-console-producer.sh \
--broker-list localhost:9876 \
--topic transcript-topic < /tmp/pinot-quick-start/rawData/transcript.json
bin/kafka-topics.sh --create --bootstrap-server localhost:9876 --replication-factor 1 --partitions 1 --topic transcript-topic
This page has a collection of frequently asked questions about ingestion with answers from the community.
max(OfflineTime) to determine the time-boundary, and instead using an offset?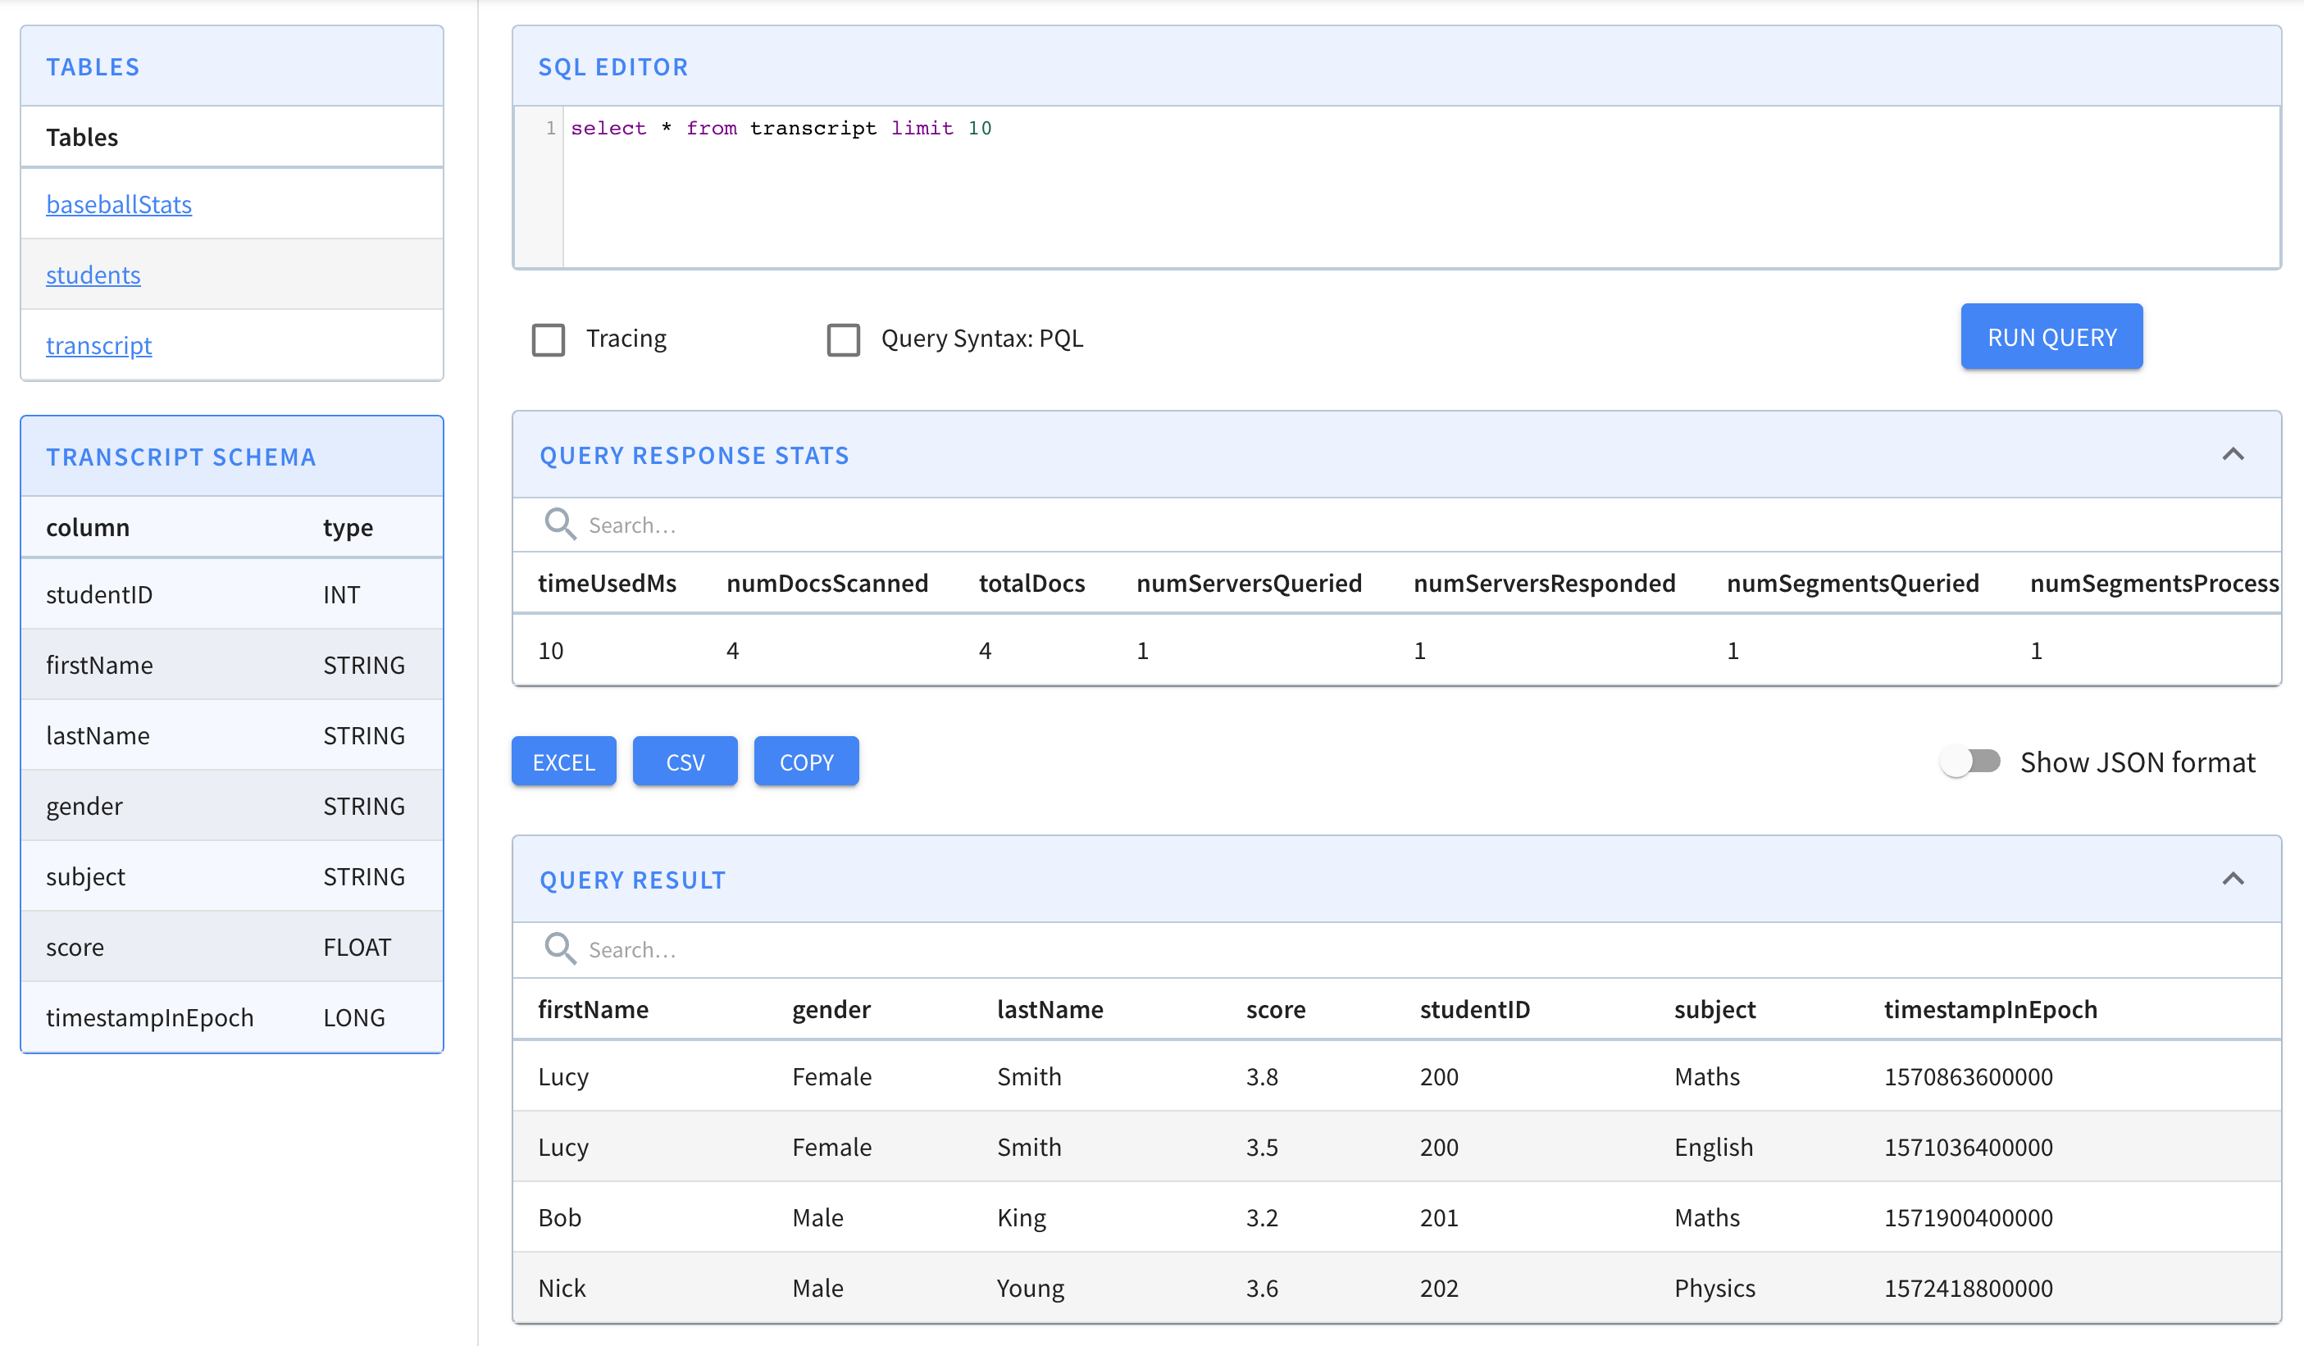
"tableIndexConfig": {
      ..
      "segmentPartitionConfig": {
        "columnPartitionMap": {
          "memberId": {
            "functionName": "Modulo",
            "numPartitions": 3
          },
          "caseNumber": {
            "functionName": "Murmur",
            "numPartitions": 12
          }
        }
}"routing": {
"segmentPrunerTypes": ["partition"]
}"tableIndexConfig": {
..
"segmentPartitionConfig": {
"columnPartitionMap": {
"column_foo": {
"functionName": "Murmur",
"numPartitions": 12 // same as number of kafka partitions
}
}
}"routing": {
"segmentPrunerTypes": ["partition"]
} {
"dataType": "STRING",
"maxLength": 1000,
"name": "textDim1"
},{
"<segment-name>": {
"segmentName": "<segment-name>",
"indexes": {
"<columnName>": {
"bloom-filter": "NO",
"dictionary": "YES",
"forward-index": "YES",
"inverted-index": "YES",
"null-value-vector-reader": "NO",
"range-index": "NO",
"json-index": "NO"
}
}
}
}mkdir -p /tmp/pinot-quick-start/rawdatarecordReaderSpecThis page has a collection of frequently asked questions about operations with answers from the community.
studentID,firstName,lastName,gender,subject,score,timestampInEpoch
200,Lucy,Smith,Female,Maths,3.8,1570863600000
200,Lucy,Smith,Female,English,3.5,1571036400000
201,Bob,King,Male,Maths,3.2,1571900400000
202,Nick,Young,Male,Physics,3.6,1572418800000{
"schemaName": "transcript",
"dimensionFieldSpecs": [
{
"name": "studentID",
"dataType": "INT"
},
{
"name": "firstName",
"dataType": "STRING"
},
{
"name": "lastName",
"dataType": "STRING"
},
{
"name": "gender",
"dataType": "STRING"
},
{
"name": "subject",
"dataType": "STRING"
}
],
"metricFieldSpecs": [
{
"name": "score",
"dataType": "FLOAT"
}
],
"dateTimeFieldSpecs": [{
"name": "timestampInEpoch",
"dataType": "LONG",
"format" : "1:MILLISECONDS:EPOCH",
"granularity": "1:MILLISECONDS"
}]
}{
"tableName": "transcript",
"segmentsConfig" : {
"timeColumnName": "timestampInEpoch",
"timeType": "MILLISECONDS",
"replication" : "1",
"schemaName" : "transcript"
},
"tableIndexConfig" : {
"invertedIndexColumns" : [],
"loadMode" : "MMAP"
},
"tenants" : {
"broker":"DefaultTenant",
"server":"DefaultTenant"
},
"tableType":"OFFLINE",
"metadata": {}
}$ ls /tmp/pinot-quick-start
rawdata transcript-schema.json transcript-table-offline.json
$ ls /tmp/pinot-quick-start/rawdata
transcript.csvdocker run --rm -ti \
--network=pinot-demo \
-v /tmp/pinot-quick-start:/tmp/pinot-quick-start \
--name pinot-batch-table-creation \
apachepinot/pinot:latest AddTable \
-schemaFile /tmp/pinot-quick-start/transcript-schema.json \
-tableConfigFile /tmp/pinot-quick-start/transcript-table-offline.json \
-controllerHost manual-pinot-controller \
-controllerPort 9000 -execbin/pinot-admin.sh AddTable \
-tableConfigFile /tmp/pinot-quick-start/transcript-table-offline.json \
-schemaFile /tmp/pinot-quick-start/transcript-schema.json -execdocker run --rm -ti \
--network=pinot-demo \
-v /tmp/pinot-quick-start:/tmp/pinot-quick-start \
--name pinot-data-ingestion-job \
apachepinot/pinot:latest LaunchDataIngestionJob \
-jobSpecFile /tmp/pinot-quick-start/docker-job-spec.ymlbin/pinot-admin.sh LaunchDataIngestionJob \
-jobSpecFile /tmp/pinot-quick-start/batch-job-spec.ymlSegmentGenerationJobSpec:
!!org.apache.pinot.spi.ingestion.batch.spec.SegmentGenerationJobSpec
excludeFileNamePattern: null
executionFrameworkSpec: {extraConfigs: null, name: standalone, segmentGenerationJobRunnerClassName: org.apache.pinot.plugin.ingestion.batch.standalone.SegmentGenerationJobRunner,
segmentTarPushJobRunnerClassName: org.apache.pinot.plugin.ingestion.batch.standalone.SegmentTarPushJobRunner,
segmentUriPushJobRunnerClassName: org.apache.pinot.plugin.ingestion.batch.standalone.SegmentUriPushJobRunner}
includeFileNamePattern: glob:**\/*.csv
inputDirURI: /tmp/pinot-quick-start/rawdata/
jobType: SegmentCreationAndTarPush
outputDirURI: /tmp/pinot-quick-start/segments
overwriteOutput: true
pinotClusterSpecs:
- {controllerURI: 'http://localhost:9000'}
pinotFSSpecs:
- {className: org.apache.pinot.spi.filesystem.LocalPinotFS, configs: null, scheme: file}
pushJobSpec: null
recordReaderSpec: {className: org.apache.pinot.plugin.inputformat.csv.CSVRecordReader,
configClassName: org.apache.pinot.plugin.inputformat.csv.CSVRecordReaderConfig,
configs: null, dataFormat: csv}
segmentNameGeneratorSpec: null
tableSpec: {schemaURI: 'http://localhost:9000/tables/transcript/schema', tableConfigURI: 'http://localhost:9000/tables/transcript',
tableName: transcript}
Trying to create instance for class org.apache.pinot.plugin.ingestion.batch.standalone.SegmentGenerationJobRunner
Initializing PinotFS for scheme file, classname org.apache.pinot.spi.filesystem.LocalPinotFS
Finished building StatsCollector!
Collected stats for 4 documents
Using fixed bytes value dictionary for column: studentID, size: 9
Created dictionary for STRING column: studentID with cardinality: 3, max length in bytes: 3, range: 200 to 202
Using fixed bytes value dictionary for column: firstName, size: 12
Created dictionary for STRING column: firstName with cardinality: 3, max length in bytes: 4, range: Bob to Nick
Using fixed bytes value dictionary for column: lastName, size: 15
Created dictionary for STRING column: lastName with cardinality: 3, max length in bytes: 5, range: King to Young
Created dictionary for FLOAT column: score with cardinality: 4, range: 3.2 to 3.8
Using fixed bytes value dictionary for column: gender, size: 12
Created dictionary for STRING column: gender with cardinality: 2, max length in bytes: 6, range: Female to Male
Using fixed bytes value dictionary for column: subject, size: 21
Created dictionary for STRING column: subject with cardinality: 3, max length in bytes: 7, range: English to Physics
Created dictionary for LONG column: timestampInEpoch with cardinality: 4, range: 1570863600000 to 1572418800000
Start building IndexCreator!
Finished records indexing in IndexCreator!
Finished segment seal!
Converting segment: /var/folders/3z/qn6k60qs6ps1bb6s2c26gx040000gn/T/pinot-1583443148720/output/transcript_OFFLINE_1570863600000_1572418800000_0 to v3 format
v3 segment location for segment: transcript_OFFLINE_1570863600000_1572418800000_0 is /var/folders/3z/qn6k60qs6ps1bb6s2c26gx040000gn/T/pinot-1583443148720/output/transcript_OFFLINE_1570863600000_1572418800000_0/v3
Deleting files in v1 segment directory: /var/folders/3z/qn6k60qs6ps1bb6s2c26gx040000gn/T/pinot-1583443148720/output/transcript_OFFLINE_1570863600000_1572418800000_0
Starting building 1 star-trees with configs: [StarTreeV2BuilderConfig[splitOrder=[studentID, firstName],skipStarNodeCreation=[],functionColumnPairs=[org.apache.pinot.core.startree.v2.AggregationFunctionColumnPair@3a48efdc],maxLeafRecords=1]] using OFF_HEAP builder
Starting building star-tree with config: StarTreeV2BuilderConfig[splitOrder=[studentID, firstName],skipStarNodeCreation=[],functionColumnPairs=[org.apache.pinot.core.startree.v2.AggregationFunctionColumnPair@3a48efdc],maxLeafRecords=1]
Generated 3 star-tree records from 4 segment records
Finished constructing star-tree, got 9 tree nodes and 4 records under star-node
Finished creating aggregated documents, got 6 aggregated records
Finished building star-tree in 10ms
Finished building 1 star-trees in 27ms
Computed crc = 3454627653, based on files [/var/folders/3z/qn6k60qs6ps1bb6s2c26gx040000gn/T/pinot-1583443148720/output/transcript_OFFLINE_1570863600000_1572418800000_0/v3/columns.psf, /var/folders/3z/qn6k60qs6ps1bb6s2c26gx040000gn/T/pinot-1583443148720/output/transcript_OFFLINE_1570863600000_1572418800000_0/v3/index_map, /var/folders/3z/qn6k60qs6ps1bb6s2c26gx040000gn/T/pinot-1583443148720/output/transcript_OFFLINE_1570863600000_1572418800000_0/v3/metadata.properties, /var/folders/3z/qn6k60qs6ps1bb6s2c26gx040000gn/T/pinot-1583443148720/output/transcript_OFFLINE_1570863600000_1572418800000_0/v3/star_tree_index, /var/folders/3z/qn6k60qs6ps1bb6s2c26gx040000gn/T/pinot-1583443148720/output/transcript_OFFLINE_1570863600000_1572418800000_0/v3/star_tree_index_map]
Driver, record read time : 0
Driver, stats collector time : 0
Driver, indexing time : 0
Tarring segment from: /var/folders/3z/qn6k60qs6ps1bb6s2c26gx040000gn/T/pinot-1583443148720/output/transcript_OFFLINE_1570863600000_1572418800000_0 to: /var/folders/3z/qn6k60qs6ps1bb6s2c26gx040000gn/T/pinot-1583443148720/output/transcript_OFFLINE_1570863600000_1572418800000_0.tar.gz
Size for segment: transcript_OFFLINE_1570863600000_1572418800000_0, uncompressed: 6.73KB, compressed: 1.89KB
Trying to create instance for class org.apache.pinot.plugin.ingestion.batch.standalone.SegmentTarPushJobRunner
Initializing PinotFS for scheme file, classname org.apache.pinot.spi.filesystem.LocalPinotFS
Start pushing segments: [/tmp/pinot-quick-start/segments/transcript_OFFLINE_1570863600000_1572418800000_0.tar.gz]... to locations: [org.apache.pinot.spi.ingestion.batch.spec.PinotClusterSpec@243c4f91] for table transcript
Pushing segment: transcript_OFFLINE_1570863600000_1572418800000_0 to location: http://localhost:9000 for table transcript
Sending request: http://localhost:9000/v2/segments?tableName=transcript to controller: nehas-mbp.hsd1.ca.comcast.net, version: Unknown
Response for pushing table transcript segment transcript_OFFLINE_1570863600000_1572418800000_0 to location http://localhost:9000 - 200: {"status":"Successfully uploaded segment: transcript_OFFLINE_1570863600000_1572418800000_0 of table: transcript"}// /tmp/pinot-quick-start/docker-job-spec.yml or /tmp/pinot-quick-start/batch-job-spec.yml
executionFrameworkSpec:
name: 'standalone'
segmentGenerationJobRunnerClassName: 'org.apache.pinot.plugin.ingestion.batch.standalone.SegmentGenerationJobRunner'
segmentTarPushJobRunnerClassName: 'org.apache.pinot.plugin.ingestion.batch.standalone.SegmentTarPushJobRunner'
segmentUriPushJobRunnerClassName: 'org.apache.pinot.plugin.ingestion.batch.standalone.SegmentUriPushJobRunner'
jobType: SegmentCreationAndTarPush
inputDirURI: '/tmp/pinot-quick-start/rawdata/'
includeFileNamePattern: 'glob:**/*.csv'
outputDirURI: '/tmp/pinot-quick-start/segments/'
overwriteOutput: true
pushJobSpec:
pushFileNamePattern: 'glob:**/*.tar.gz'
pinotFSSpecs:
- scheme: file
className: org.apache.pinot.spi.filesystem.LocalPinotFS
recordReaderSpec:
dataFormat: 'csv'
className: 'org.apache.pinot.plugin.inputformat.csv.CSVRecordReader'
configClassName: 'org.apache.pinot.plugin.inputformat.csv.CSVRecordReaderConfig'
tableSpec:
tableName: 'transcript'
schemaURI: 'http://localhost:9000/tables/transcript/schema'
tableConfigURI: 'http://localhost:9000/tables/transcript'
pinotClusterSpecs:
- controllerURI: 'http://localhost:9000'SegmentUpload API.{
"tableName": "pinotTable",
"tableType": "OFFLINE",
"segmentsConfig": {
"replication": "3",
...
}
..{
"tableName": "pinotTable",
"tableType": "REALTIME",
"segmentsConfig": {
"replicasPerPartition": "3",
...
}
.."instanceAssignmentConfigMap": {
"COMPLETED": {
"tagPoolConfig": {
"tag": "DefaultTenant_OFFLINE"
},
"replicaGroupPartitionConfig": {
}
}
},curl -X POST "{host}/segments/{tableNameWithType}/{segmentName}/reset"cluster.tenant.isolation.enable=falsecurl -X POST "http://localhost:9000/tenants"
-H "accept: application/json"
-H "Content-Type: application/json"
-d "{\"tenantRole\":\"BROKER\",\"tenantName\":\"foo\",\"numberOfInstances\":1}"Using "POST /cluster/configs API" on CLUSTER tab in Swagger, with this payload:
{
"<taskType>.timeoutMs": "600000",
"<taskType>.numConcurrentTasksPerInstance": "4"
}{
"tableName": "pinotTable",
"tableType": "REALTIME",
"routing": {
"instanceSelectorType": "replicaGroup"
}
..
}{
...
"fieldConfigList": [
{
"name": "ArrTimeBlk",
"encodingType": "DICTIONARY",
"indexes": {
"inverted": {
"enabled": "true"
}
},
"tierOverwrites": {
"hotTier": {
"encodingType": "DICTIONARY",
"indexes": { // change index types for this tier
"bloom": {
"enabled": "true"
}
}
},
"coldTier": {
"encodingType": "RAW", // change encoding type for this tier
"indexes": { } // remove all indexes
}
}
}
], "tableIndexConfig": {
"starTreeIndexConfigs": [
{
"dimensionsSplitOrder": [
"AirlineID",
"Origin",
"Dest"
],
"skipStarNodeCreationForDimensions": [],
"functionColumnPairs": [
"COUNT__*",
"MAX__ArrDelay"
],
"maxLeafRecords": 10
}
],
...
"tierOverwrites": {
"hotTier": {
"starTreeIndexConfigs": [ // create different STrTree index on this tier
{
"dimensionsSplitOrder": [
"Carrier",
"CancellationCode",
"Origin",
"Dest"
],
"skipStarNodeCreationForDimensions": [],
"functionColumnPairs": [
"MAX__CarrierDelay",
"AVG__CarrierDelay"
],
"maxLeafRecords": 10
}
]
},
"coldTier": {
"starTreeIndexConfigs": [] // removes ST index for this tier
}
}
},
...